Google has begun notifying users of its integration of passkey support for Google Accounts. This new authentication method has been introduced to enhance account security and make the login process easier and more convenient for users. By eliminating the need for passwords, passkey support offers a safer alternative to traditional 2-step verification methods. In this article, we’ll take a closer look at passkey support and how it works, as well as the benefits it offers to users.
What is Passkey Support?
Passkey support is a new authentication method that eliminates the need for passwords. Instead, you can use a passkey that uses your fingerprint, face, or screen lock to sign in to your Google Account. This authentication method is safer than most other forms of 2-step verification, as it requires a physical device to authenticate access to your account.
How Does Passkey Support Work?
Passkey support is a new authentication method introduced by Google to enhance the security and convenience of Google Accounts. This method allows users to sign in to their accounts with just a passkey that uses their fingerprint, face, or screen lock. Here’s how it works:
- Passkey support works on any device that has registered passkeys, including all Android phones on which you are signed in.
- If “Skip password when possible” is turned on for your account, you won’t need to enter a password to sign in to your account.
- You won’t need to select a single phone to use as your built-in security key anymore.
- When you attempt to sign in to your Google Account on a new device or browser, you’ll receive a notification on your registered device asking you to confirm the sign-in attempt.
- Simply tap “Yes” on your device to confirm the sign-in attempt and access your account.
- If you don’t recognize the sign-in attempt, you can tap “No” to deny access and take additional security measures, such as changing your password or enabling 2-step verification.
- If you lose your device or it gets stolen, you can use another registered device to remove the lost device’s pass-key. And prevent unauthorized access to your account.
- You can manage your passkey settings and view your registered devices on your Google Account security page.
How to enable and use passkeys or create a passkey
To enable and use passkeys or create a passkey for your Google Account, follow these simple steps:
- Go to the Google Account Security page and sign in to your Google Account. If necessary, verify that it’s you or follow direct link g.co/passkeys
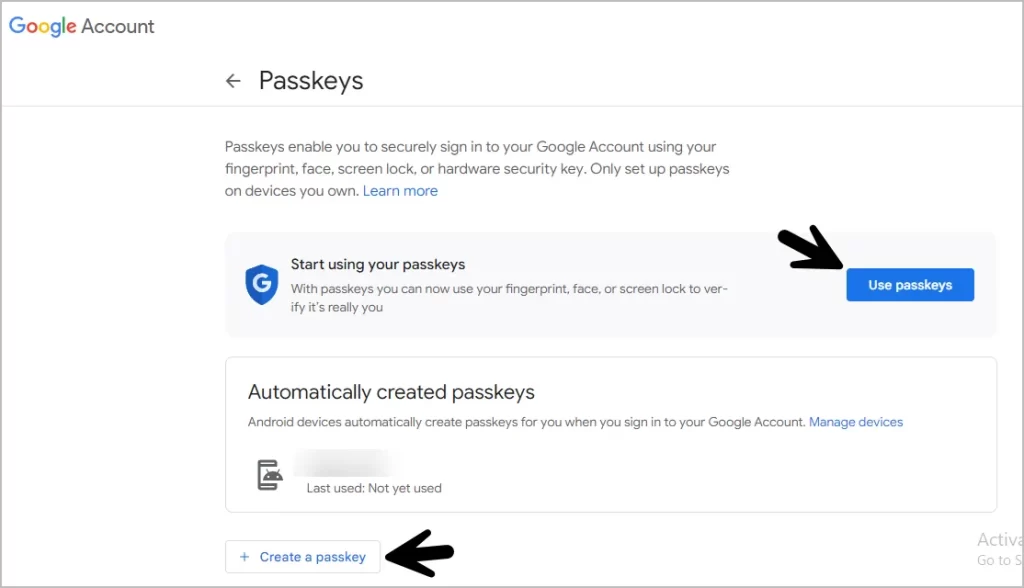
- Once you’re on the Security page, you’ll see the Passkey section. If you’ve previously created passkeys, they will be listed here. If not, you’ll see a “Create a passkey” option.
- Tap “Create a passkey” and then “Continue” to start the process.
- Follow the instructions to create your passkey. If you’re creating a pass-key for the first time, you’ll need to set up your passkey on your personal device.
- Once your passkey is created, you’ll be able to sign in to your Google Account using your passkeys. If you have multiple devices, you can create passkeys on each of them by following these steps.
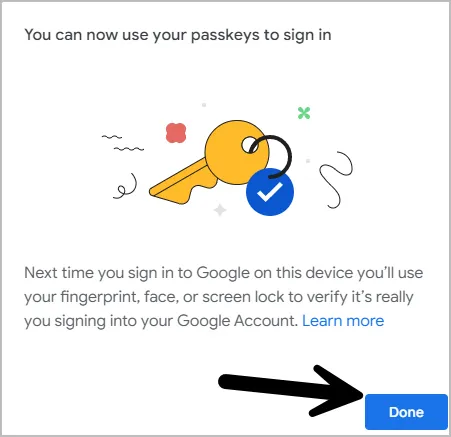
Note: It’s important to exercise caution when creating a passkey because you’ll be opting into a password-free sign-in experience. Remember to only create passkeys on your personal devices that you have control over. It’s worth keeping in mind that if someone else can unlock your device, they can also sign into your Google Account using your pass-key. So, always make sure you’re the only one with access to your personal devices when creating passkeys.
In summary, passkeys support offers a more convenient and secure alternative to traditional 2-step verification methods by eliminating the need for passwords and allowing users to sign in with a registered pass-key on any device
Passkey Creation: Check if Your Device and Browser Meet the Requirements
To create and use a passkey for your Google Account, you’ll need to meet certain requirements depending on the device you’re using. Here are the specifications for creating a passkey:
Supported Devices:
- A laptop or desktop that runs at least Windows 10, macOS Ventura, or ChromeOS 109
- A mobile device that runs at least iOS 16 or Android 9
- A hardware security key that supports the FIDO2 protocol
Supported Browsers:
- Chrome 109 or up
- Safari 16 or up
- Edge 109 or up
Device Settings:
- Screen lock
- Bluetooth
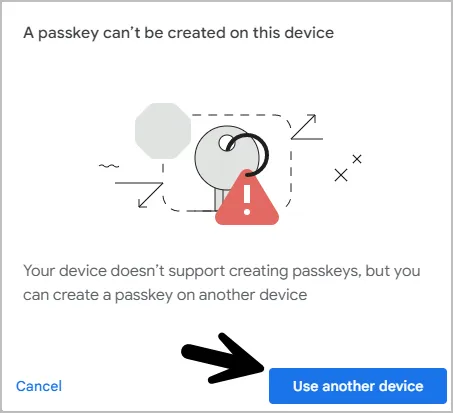
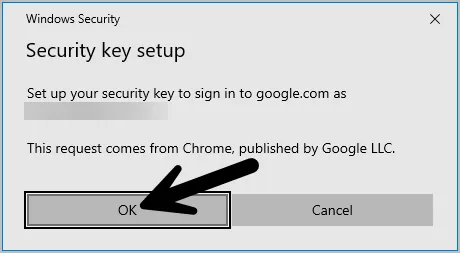
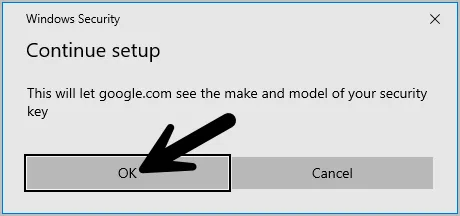
To ensure the best pass-key experience, it’s recommended that you update to the latest available releases for your operating system. Note that depending on your operating system and browser, you may not be able to create or use passkeys while in private browsing mode like incognito or other equivalent.
Why is Passkey Support Being Integrated?
Passkey support is being integrated because it is easier to use and safer than most other forms of 2-step verification. With the rise in cyber threats, it is important to have a secure authentication method that is convenient for users to use. This new authentication method provides a more streamlined and secure user experience.
Do You Need to Take Any Action?
No action is required from you. However, you can turn off “Skip password when possible” in your Google Account security page if you prefer to use a password to sign in to your account.
Google now has Passkey support – a password less authentication method. Sign in to your account with your fingerprint, face, or screen lock. Passkeys also provide added security with notifications for new sign-in attempts. Create a pass_key easily on the Google Account Security page. Use caution when creating passkeys on personal devices for security.
You may like these previous posts:

